Mousebumples sent us (TaMara and me) this sweet image.
As long as we are talking about something sweet…
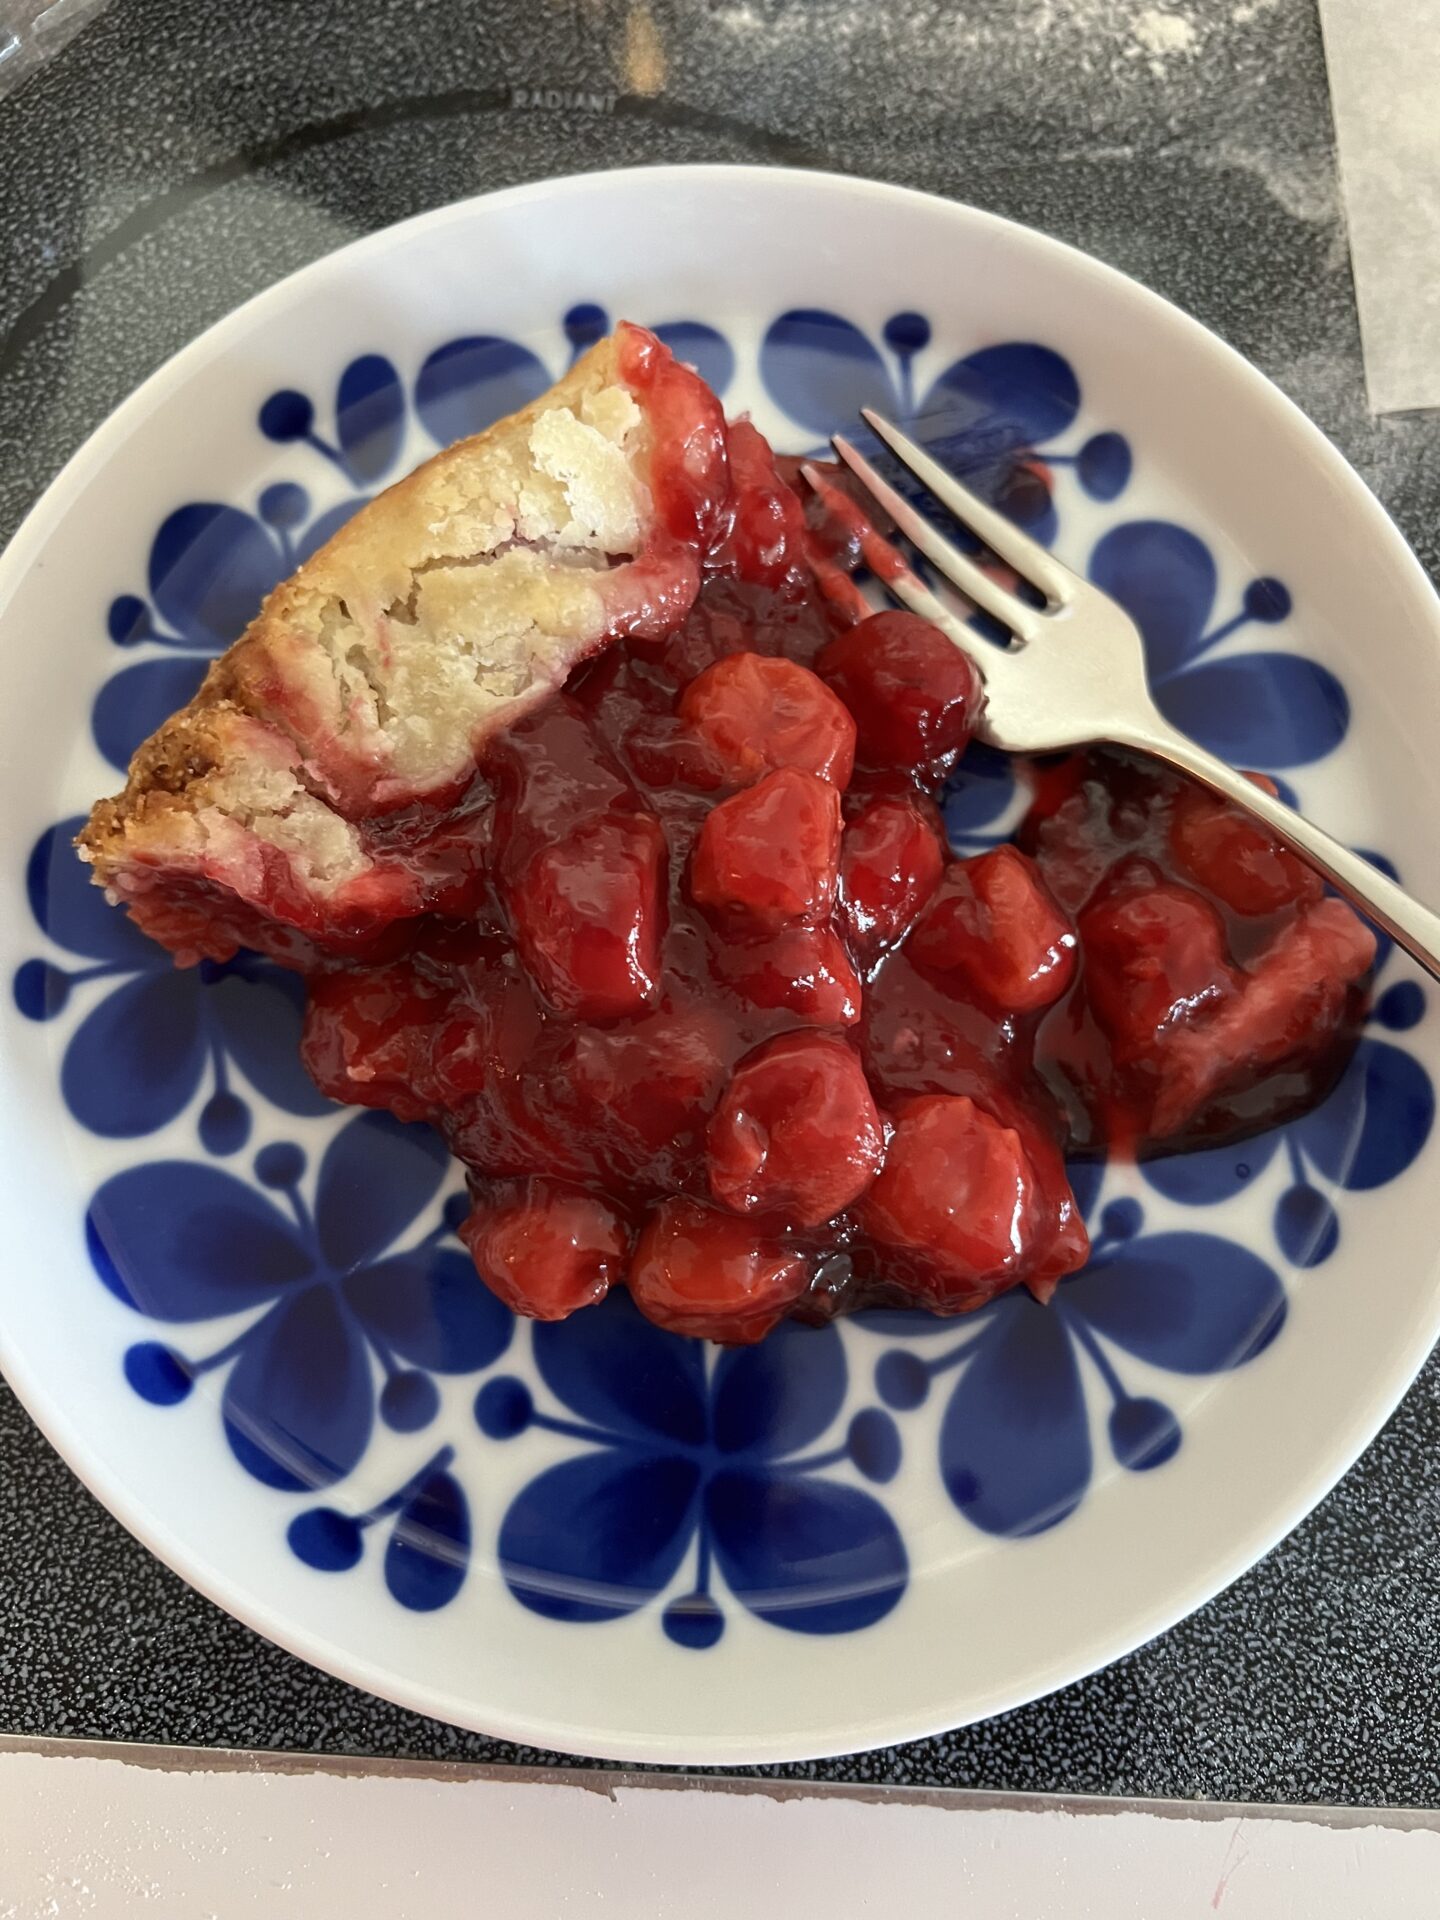
Someone asked for my recipe for cherry galette awhile ago. Recipe below in .pdf format.
Now I want some. :-)
by WaterGirl| 51 Comments
This post is in: Mostly Open Thread, Recipes
This post is in: Food & Recipes, Recipes
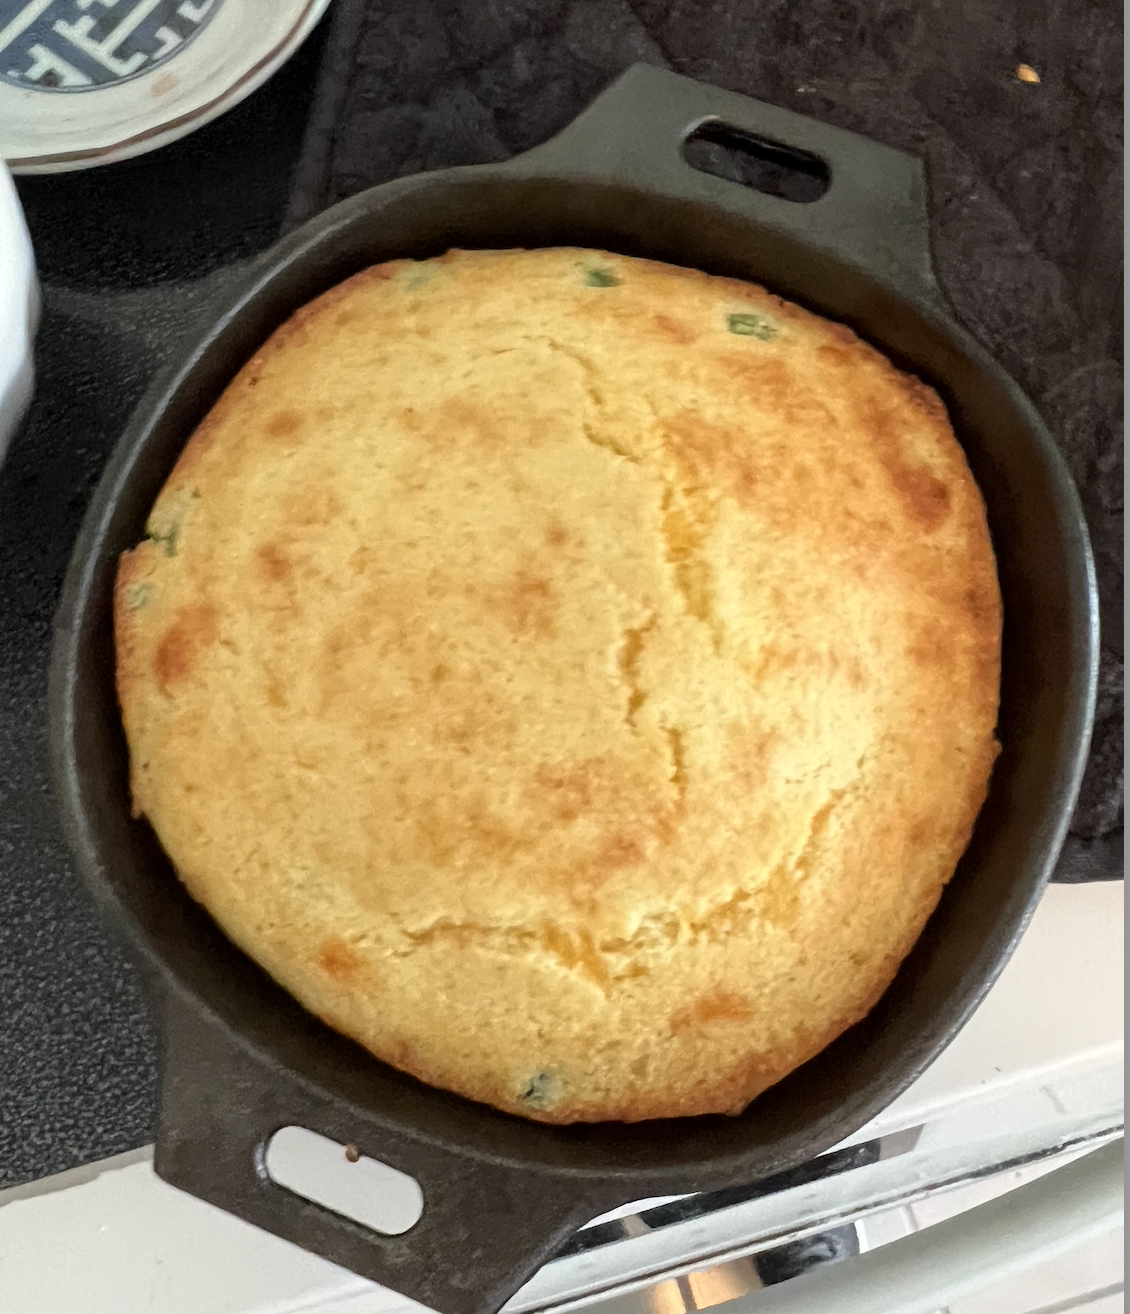
Ramalama mentioned Jiffy cornbread in an earlier thread. I grew up on that, and over the years I must have tried a dozen cornbread recipes – with the results ranging from so awful that I threw it out TO why would anyone want to eat this?
But I finally found a jalapeño cheddar cornbread recipe from Pampered Chef that I absolutely LOVE.
I make it in their little mini 5.5 mini cast iron skillets, which it appears they don’t sell anymore. :-(
It’s cold and snowy, seems like a good time for a recipe thread.
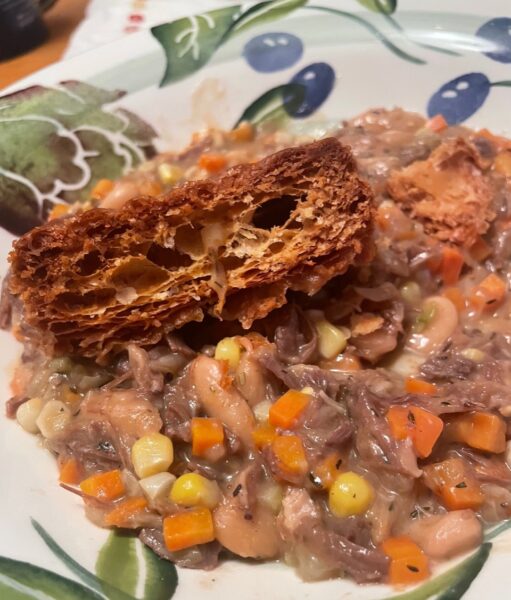
Definitely hoping that Betty Cracker will share the slow cooker pork recipe she mentioned in the morning thread. (please please please) For me, both pork and chicken need to have good spices to make them appealing to me. Based on the short description from Betty, I have high hopes for that one.
Recipe thread!
Finally, a Cornbread Recipe that I LovePost + Comments (109)
by TaMara| 60 Comments
This post is in: Food & Recipes, Recipe Exchange, Recipes, yes, I know your recipe is always better than mine
narya and I were talking about using weights to bake – I think I was talking about bread, specifically. She was kind enough to write up a little primer on why it’s better to weigh your items instead of just measuring them, in case you were wondering about the hows and whys of it all.
I lean heavily on King Arthur’s Weight Chart, found here.
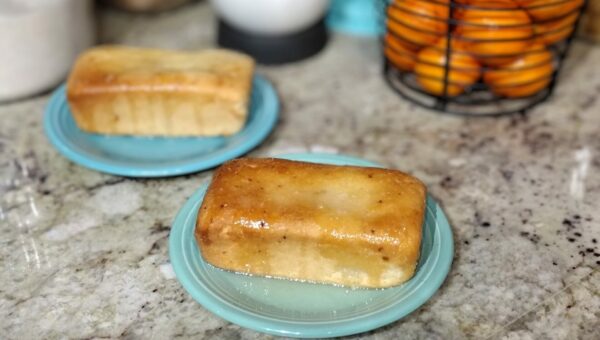
I’m having a friend come over today and we’ll be out and about, but I decided we needed a fun coffee treat, we’ve both had a rough week or two. Their bunny rescue just had 12 baby bunnies show up – five with a mamma and the others were orphans. So lots of hand feeding. Not all of them are going to make it, but they’ll give it their best. She’s up here with a bunny at a vet who specializes in small critters.
That of course, required a sweet treat. The recipe for my completely improvised Key Lime Cake with Key Lime Glaze is here. So we’ll have coffee, cake and commiserate.
==========
From narya:
How to Bake (and Cook) Better
When I went to pastry school, one of the first things they taught us was weighing (120 grams of flour) versus measuring (1 cup of flour). The formulae they gave us used grams rather than ounces. I immediately liked this method, even though it took a bit to get used to it. TaMara thought it might be useful to introduce you jackals to this, if you’re not already familiar with it.
Percentage of what?
This method is also know as “baker’s percentage.” There are two methods available: in pastry school, the “percentage” was “percentage of the total weight of ingredients.” The other method—which was used at the bakery where I worked—“percentage” was “percentage of the amount of flour in the recipe.” I don’t use the latter version, not least because not everything I make has flour in it. I also found it more difficult to do the math in the latter method; it always felt like I was adding an extra step. I think it’s more relevant to baking bread or anything else that uses a lot of flour, but, really, the former method is simpler, especially on the fly.
Metric or not?
If you don’t already love the metric system, baking and cooking with weights instead of measures will convert you to metric. All of the formulae at the bakery were in pounds and ounces, and good lord was that a pain in the ass if you wanted to increase or decrease the size of a batch. Imagine that the formula calls for 1 lb 9 ounces, but then you need to double it: now it’s 2 pounds plus 18 ounces, oh wait, 3 pounds 2 ounces. If you’re using metric, and you start with 700 grams, if you double it, it’s 1400 grams: easy peasy. A lot of cookbooks and recipes have started giving weights. However, unless it’s European, probably the weights are in ounces and pounds; most scales I’ve seen let you choose.
What I’ve done is, for a given recipe, simply change the measure to grams and write it in the cookbook. There are conversion tools online, too. Once you start doing this, you’ll memorize a few things quickly—e.g., a cup of flour is about 120 grams. Some things you can get from the nutrition panel on the package; there’s usually a notation of the weight in grams as well as ounces for whatever measure constitutes a serving. And for nearly everything, there’s a bit of fudge factor. For example, King Arthur gives a different weight for 1/4 cup of all-purpose flour and for 1/4 cup of whole wheat flour; I don’t even bother making that adjustment. Other things will also affect the weight of the flour (e.g., how dry or humid the flour is), and it’s not necessary to be that precise.
So: what are the main ways I use this, other than straight-up following a recipe?
One fabulous use is for changing a recipe to use a different size pan. Let’s say you have a recipe that calls for an 8×8 pan, but you want to make it for a 9×13 pan. First, calculate the total square inches: 64 for the former and 117 for the latter. Next, divide 117 by 64: 1.83. Use that multiplier on each item in your recipe. So, if your original recipe called for a cup of flour (120 grams), your new recipe calls for 219 grams of flour. It works the other way around, of course: the dimensions of the pan you want to use are divided by the dimensions of the pan used in the original recipe.
A second use is for scaling a recipe to match the amount of something that you have. For example, if you want to make macarons with the egg whites left over from some other adventure, weigh the egg whites and then scale the recipe based on that weight. That is, if the original recipe calls for 100 grams of egg whites, but you have 125 grams of egg whites, multiply the weight of each of the ingredients by 1.25 (125 divided by 100).
A third use is when you want to create a recipe, because you can’t find the exact one you want. For example, last week I wanted to make blondies with apricots, dates, and nuts (I’ll leave out the nuts next time). I rummaged around to find what looked like it might be a good blondie recipe, and then I referred to a gingerbread recipe that I made a few weeks ago that I liked, and I ballparked a new recipe. Why didn’t I just use the blondie recipe? Because it didn’t have a lot of invert sugar in it (invert sugars are liquid: honey, molasses, date syrup, corn syrup, ginger syrup, etc.), but the gingerbread recipe did, and I wanted to use some molasses and honey. Invert sugars work differently in baked goods, because they’re adding moisture as well as sugar. Honestly, I was pleased with the result, but it could have (and has, in the past) gone horribly wrong: that’s where a certain amount of experience is helpful (but not foolproof).
Similarly, a friend had “adapted” the Joy of Cooking banana bread recipe (most notably by replacing the lard with butter and applesauce) and then added a whole raft of stuff—seeds, nuts, chocolate chips, etc. The final result, was a dense, soggy, loaf—if he used muffin tins, they looked and felt like hockey pucks. After literally years of asking, he finally allowed me to make some suggestions: he sent me his current formula, and I compared it to one that I like, and I adjusted the amounts of a number of his ingredients. (I long ago converted him to weights instead of measures.) The first time he tried my adjustments, there was immediate improvement. I think the remaining issues are the result of way too many additions, but he won’t budge on that.
Finally, I use a scale a lot when I’m making grains. I figure out the ratio (usually given on the package), and then I weigh out the grain and the water. You can always add a little water if your grains aren’t quite cooked.
All you really need is a good kitchen scale: I have two from Escali. Get one that goes to 11 pounds or so, so that you can put pots and pans on it and weigh ingredients directly into the pot. It’ll cost you maybe $30, and it’s worth every penny.
Now on to the cooking:
One of my absolute biggest peeves is underbaked baked goods. While it’s a general complaint, and while I have way too many opportunities to haul that complaint out into the light of day, I am particularly annoyed when any kind of laminated pastry is involved. (I also object to underbaked cinnamon rolls, or any other kind of baked good where the dough is rolled.)
For one thing, underbaked stuff doesn’t taste as good as properly baked stuff tastes. If it’s underbaked, you’re likely missing all of the goodness that results from a Maillard reaction and/or caramelization (related but not identical processes). That’s the issue on the surface of the baked item. Inside is a whole other, even worse, story. Instead of being toothsome and tasty, the inside of an underbaked item is gooey. Not gooey in the way that caramel sauce is gooey, but gooey in the way that raw dough is gooey. Yuck.
Three weeks ago, friend and I went to a local bakery that produces some of the best bread I’ve ever had (also: most expensive); in addition to bread, we picked up a couple of cherry galettes for dessert, which was the start of this saga. They looked pretty good—golden on top, etc.—but they were underbaked; the layers were pale and gummy instead of flaky. This led me to making my own damn puff pastry.
First, a side note: Croissants and Danish pastry are both yeasted and laminated—that is, the dough has yeast in it, AND the dough is layered with butter (laminated) in a way I’ll describe in a minute. Puff pastry is NOT yeasted, but IS laminated. What all of them share is that part of the “rise” of the product happens during the first part of baking: the layered butter gives off steam, which makes the item puff. If it’s also a yeasted product, then the dough rose prior to baking, as well, from the yeast. Laminated dough is magic. I say this as someone who made croissants professionally for two solid years. If you do it right, and if the overnight bakers proof and bake it properly, and if baking deities are looking over your shoulder, you end up with an impossibly flakey, golden brown, buttery, airy treat. When the inside is baked properly, you see the structure of the item, and it’s not gooey.
Puff pastry isn’t yeasted, so all of the “puff” comes from that steam. A classic use of puff pastry is a Napoleon: layers of puff pastry interspersed with pastry cream. In this usage, you put a grate (like a cooling rack) over the pastry for the first 30 minutes of the bake, which gets the thing puffing somewhat, but also flattens it. For other uses, you don’t weight it down.
On to lamination. I saw descriptions of this process many, many times over the years, and . . . I didn’t quite believe it. Now that I’ve done it literally thousands of times, it’s only a little less mysterious. Essentially, you start with a dough (yeasted or not, depending on what you’re doing) and a “pad” of butter, you encase the latter in the former, and then you roll it out and fold it over on itself, so that you’re creating many very thin alternating layers of butter and dough. To start, you pound the butter into a rectangle of the size you want; a long rolling pin (the kind with no handles) is perfect for that. The butter becomes flexible—neither melted nor hard. Basically, the butter needs to be pliable. If it’s soft, it will melt into the dough, but if it’s hard it will break up as you create your layers.
Second, the butter should fit neatly into the dough. Roll the dough out so that it’s as close to exactly twice the dimensions of the butter as possible. Put your dough rectangle so the long edge is closet to you, then put your butter in the middle of it, with the short edge facing you, and join the dough in the center. (Others describe different methods for this, but it’s my go-to.) The dough needs to encase the butter, but you don’t want a lot of space at the edges where it’s all dough. After that, it’s a matter of putting as many “folds” into the dough as the formula calls for; the number of folds varies, depending on the product. A fold means you’re rolling out the dough/butter package, in the opposite direction from last time, and then folding it in on itself, like you fold the paper to put in an envelope. Doing this with a two-way dough sheeter like I used at the bakery makes the process go very quickly; doing it by hand takes longer, but not onerously so for a single batch.
Anyway, I mixed up a batch of dough on a Saturday, got the dough and butter into the right shape, and started laminating. By the second or third time rolling out the dough and folding it, I was thinking to myself that the dough felt really good; it felt “right.” It’s literally embodied knowledge, and therefore difficult to describe, but anyone who makes anything is familiar with that sensation of realizing that this instance of what one is making is a good one.
As I put the final folds into the dough on Sunday, I started thinking about what, exactly, I wanted to make, because I hadn’t had a clear plan. (Yeah, I know.) Luckily, I was heading downstairs that day—for Easter—to once again attempt to make paella for Downstairs Neighbor and another friend, so this could be a dessert. After rolling the dough out the final time, I cut the dough into squares and baked four of them and froze the rest. Here’s a pic of the baked squares. (Unfortunately, I didn’t think to cut the squares out of the middle until partway through the bake, but it worked out anyway.) In this case, instead of baking with the grate over top for the first 30 minutes, I only baked with the grate for the first 15, so it would puff a little more. I sprinkled a little sugar on them at the end of the bake time.
Baked squares
I had made some chocolate pastry cream the night before, for some leftover cream puffs I found in the freezer, so I made some cherry compote as well. Easter dessert, shown here, included a puff pastry square, cherry compote, and chocolate pastry cream. That still left one more baked square, which my friend used the next morning as a “container” for a scrambled egg and cheese.
Dessert
Last Friday, I took out two more squares and baked them, this time with a non-dessert plan. I used shredded wild turkey, carrots, onions, cassoulet beans, and some of last summer’s corn, along with turkey stock and a roux, to make pot pie filling. I did it on the stovetop and then put a square of the baked puff pastry on top to serve it. As you can see from the second picture, the puff pastry was, in fact, baked through. The only thing better than using up stuff that’s in the freezer is adding a fully baked flourish to it. There are still a few more squares in the freezer, but I don’t have a plan for them yet.
Dinner
Fully Baked
And it’s all because I got an underbaked cherry galette from a bakery that should know better. – narya
===========
That’s it for this weekend. I’m going to try and tackle a climate post on the national grid system soon – but I’m traveling this next week, so not sure how soon I can get to it. And after that…more beavers saving the planet and other rewilding projects.
Now it’s your turn, what’s on your plate this weekend? What’s cookin’ in your kitchen and what cooking tips do you have to share? – TaMara
by TaMara| 89 Comments
This post is in: Food & Recipes, Guest Posts, Recipe Exchange, Recipes, yes, I know your recipe is always better than mine
The other day, narya and I were talking about the late winter cooking blues and how we handle it. Seems we both look to fruit recipes to help us make it to the time of fresh spring ingredients.
I start making a lot of recipes with lemons – Chicken Piccata (recipe below), Lemon Nut Pork Chops (recipe here), lemon desserts
and blueberries. Love me some blueberries (I’m making Grilled Sirloin with Spicy Blueberries tonight) Pictured above: Perfect Blueberry Pancakes (recipe here)
I always think that Chicken Piccata is going to be a nice light dish until I reread the recipe and remember it always takes more oil and butter than I think as I go along. Oh, well, not every meal has to heart healthy, LOL
Chicken Piccata
bowl, skillet
Combine breadcrumbs, basil, zest, and pepper in bowl. Mix ½ tbsp oil and garlic together. Coat both sides of chicken with oil/garlic and dredge in breadcrumbs. Over medium-high heat 1 tbsp ea. of butter and oil in skillet, add chicken and cook 4-5 minutes on each side. Remove chicken – keep warm – add lemon slices to pan, sauté 30 seconds, add water, parsley and juice, boil for 1 minute, spoon over chicken.
*Scrub well before slicing.
From narya, her Strawberry and Chocolate Cake:
This is such a hard time of the cooking year for me: the farm share people want to give me onions, carrots, root veggies, and potatoes (and spinach), but potatoes don’t do all that much for me and most of the root veggies are brassicas. I love a lot of brassicas—kale, broccoli, and cauliflower in particular—but they are offering things like turnips and parsnips and cabbage. I have discovered that I cannot eat any brassicas in their raw state, and that some of them will fight me even if I cook them first. I like purple potatoes, and sweet potatoes can be used with a lot of Asian spices, but, again, there’s only so much I can eat. Two other things have helped this year: I froze a lot of corn that I par-boiled then cut off the cob, and I roasted a lot of tomatoes and froze those. I’ve been hoarding them a bit, because we still have so much of winter to go.
For an excess of potatoes, I make gnocchi. I use the Lucky Peach recipe (archived here: https://web.archive.org/web/20170722084123/http://luckypeach.com/how-to-make-gnocchi/ ). I’ve used all kinds of potatoes, including purple and sweet: that means I end up with purple or orange gnocchi. I currently have some of the types of potatoes he recommends, and I will likely turn them all into gnocchi this weekend. Here’s the important part: if you’re going to go to the trouble of making gnocchi, make a LOT of it. After you boil them, you can spread them out on cooling racks and freeze them (don’t do this in lumps—you have to spread them out), then bag and freeze the frozen gnocchi for a later meal. Thaw them spread out, too, rather than in a lump. I also save the skins and roast them till they’re crispy. I don’t want to throw away anything I can use.
Still: brassicas and potatoes and onions and carrots. Then again, dessert makes everything better, so let’s go there.
I always get a bunch of frozen fruit from the farm share (or the grocery store if need be), especially strawberries. Keeping in mind that I eyeball a lot of things, here’s my favorite way to use them. I start with Smitten Kitchen’s easy chocolate cake (link to recipe here) and I hack it in the following ways.
Hack number 1: Fruit and Frosting
First, take a bunch of frozen strawberries (cherries work too), and throw them in a saucepan with a little sugar and some lemon rind if you have it; cook it down. (This week I started with well over a pound, but I divided the results in two and froze half.) Let it simmer for awhile (half an hour?) on low, then scoop out the berries with a slotted spoon and reduce the liquid even further, until it’s very thick and syrupy. Get out your mixer and make frosting with some of the cooled fruit syrup, confectioner’s sugar, and a little butter; you’ll need more sugar than you think, especially if you use a fair amount of the syrup. Why do I make the frosting first? Because it’s easier to make in a mixer than by hand, and then I don’t have to wash the beater—there are no raw ingredients that can hurt you. If you make the cake and then the frosting, you have to wash between, because of the eggs and flour. If you don’t like this much frosting, you can make a simple glaze with the strawberry syrup and some confectioner’s sugar. Strawberry frosting makes everything better. (Powdered dried fruit will also work!)
Hack number 2: More Fruit!
Mush up the strawberries and add them to the cake. If I’m ambitious, I’ll pull out my mini food processor, but not always. I’ll note that it can be hard to taste them in this hack; the chocolate is pretty strong, so if you are looking to taste the fruit, go with hack 2.5.
Hack number 2.5: Fruit Filling
Mush up strawberries and possibly a little of the syrup with cream cheese and use that as a filling for the cake. Put half the batter in the pan, put the strawberry/cream cheese mixture in, then put the rest of the batter on top. This does work better if you puree the fruit a bit. Use a pastry bag or a plastic bag with a corner cut off, rather than trying to spread the mixture. You can add an egg or a little cream or milk if you need to make the filling more spreadable, but not too much.
Hack number 3: Other ingredients
Go ahead and use two eggs. I am not going to use a yolk for this and have a white sitting around. For the cocoa, I use a combo of King Arthur three-cocoa blend and a little bit (maybe 10 grams) of King Arthur black cocoa. I also added a little baking powder (half a teaspoon?), to make up for a lack of acidity for the baking soda. Cocoa powder is something I tend to buy in bulk, because it’s so useful and it lasts, so I usually have several varieties sitting around.
Hack number 4: Liquid
I rarely have buttermilk around. I have used sour milk; yogurt plus water; water; milk; yogurt plus water plus whatever’s left of the strawberries and/or syrup. . . you get the idea. It can affect the rise of the cake, but I guarantee you that for this kind of casual cake, a flatter cake that is slathered with strawberry frosting will still make everyone happy. I also add good-quality chocolate chips sometimes—be aware of that when you test for doneness, as a chocolate chip might make you think it’s not done when it is.
In addition to chocolate and berries being a classic combo, I find that the sweet taste of spring fruit helps mitigate the endless slog of brassicas and potatoes that is the winter farm share.
So that’s how we get past the winter cooking blues. I also start making slaws – jicama slaw and coleslaw – anything that is fresh and crunchy helps. Sidenote: I just talked to a friend in LA who said that everything is so very green there now that the storm had passed and I was a little jealous. Then I remembered in the fall I planted over 60 new bulbs, so I have that to look forward to.
What foods get you through those last days of winter? Do you get bored with winter fair around this time, too? What are you most looking forward to enjoying as the weather warms?
Saturday Afternoon Recipes: Beat The Winter Cooking BluesPost + Comments (89)
by TaMara| 54 Comments
This post is in: Food & Recipes, Recipe Exchange, Recipes
I’m making three lasagnas this weekend. One will be for the Christmas Eve party and the other two are gifts, along with a loaf, for each, of a good, fresh crusty bread. I’m running around like crazy, but wanted to put up a quick recipe thread.
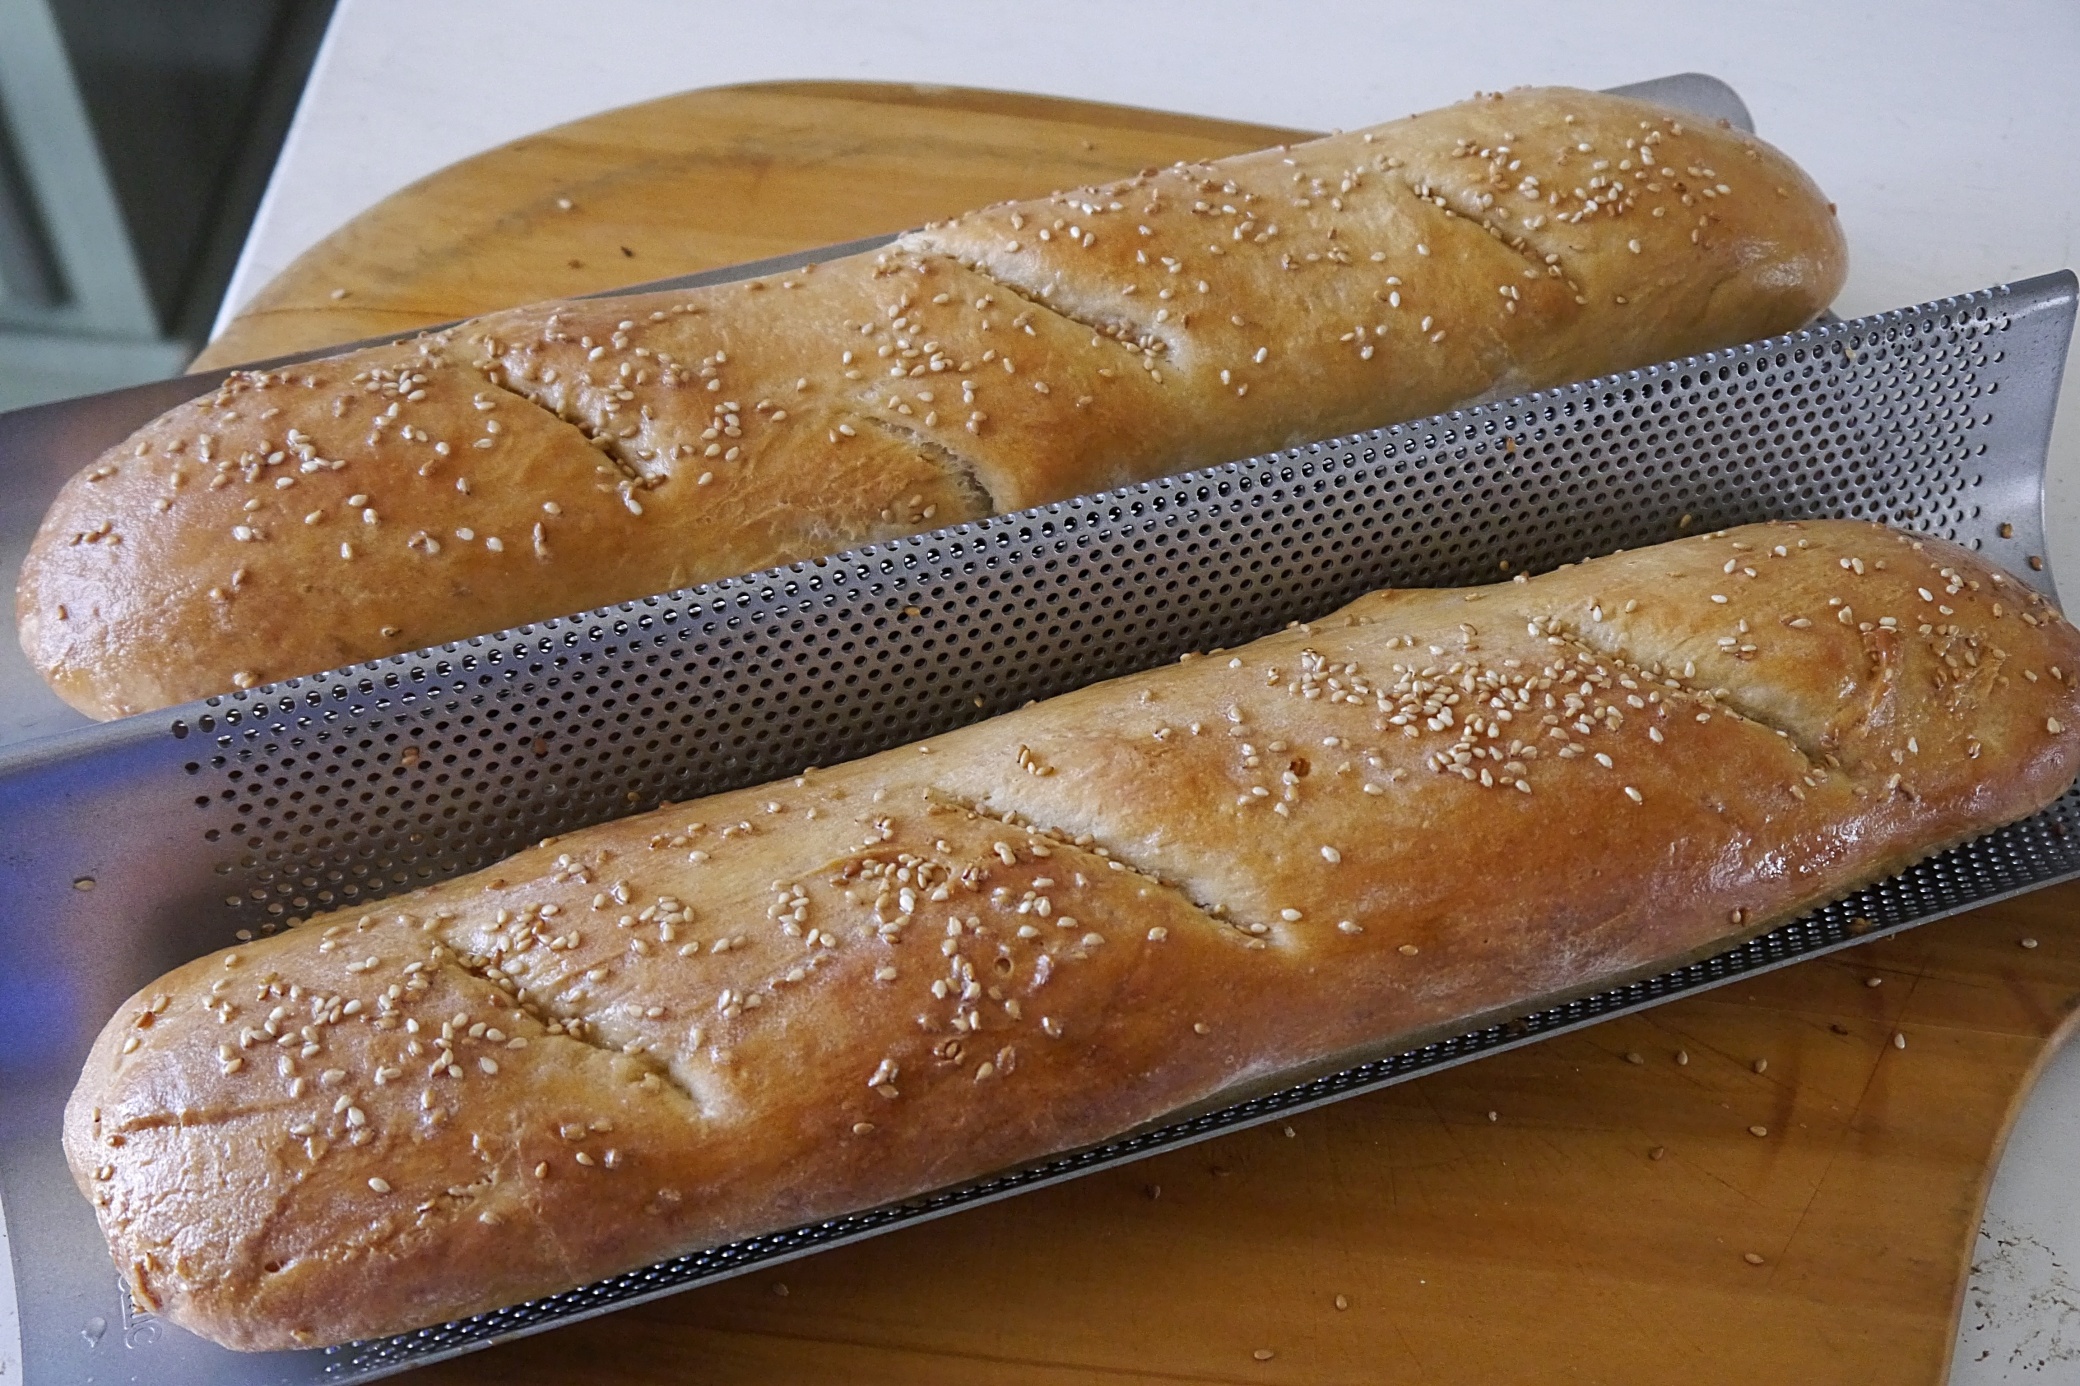
Crusty Slow-rise Bread recipe here
I’m also making Chicken Parmesan for an after Christmas dinner party – I’ll post that recipe another time, when I have photos and the steps worked out. I usually just do it from memory, without a recipe, so I’ll need to pay attention and write it down this time.
The good news is, for all this cooking, it’s just one batch of sauce. A big batch, but one batch all the same.
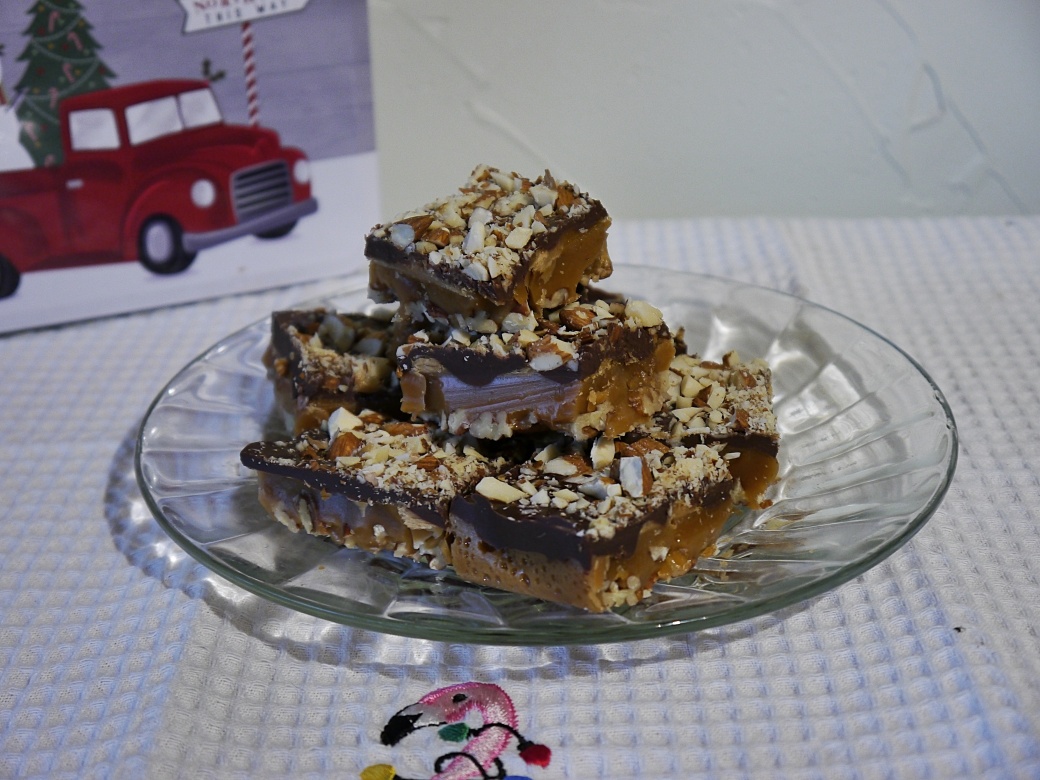
I’m also making Toffee again this year. Last year I watched a video and it looked so simple, considering how expensive the good stuff is when you buy it, and it was incredibly easy. And a big hit and everyone wants it again this year. So I’ve stocked up on butter every time it went on sale and the rest I always have on hand. Toffee video and recipe are here.
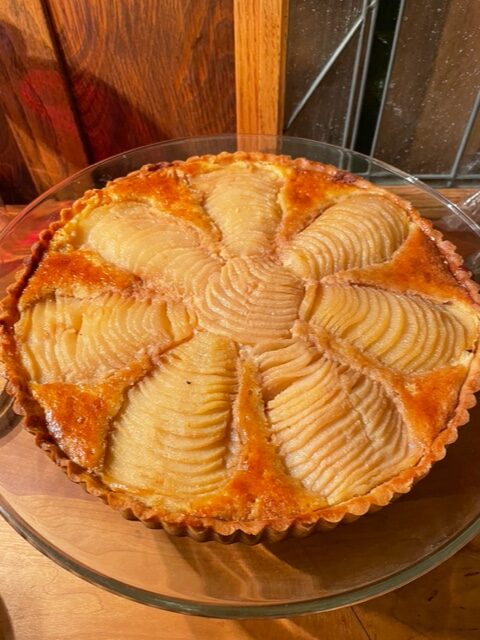
Speaking of never using a recipe, in the last recipe post narya was sharing some delicious dishes. I asked if she wanted to share the poached pear tart recipe in a recipe exchange post…and I was told there wasn’t really a recipe. This beautiful dish is just something she whipped up:
Here’s how she prepared it. You can quiz her on details if you want to try it yourself.
As some of you may remember, one of my desserts for the Thanksgiving Festival that A Good Woman hosted was a poached pear tart. (If I ever get access to my FYWP blog, I’ll give you the backstory of the tart there.) The original recipe is from Cooks Illustrated, but it’s pretty straightforward: a sablee crust, an almond frangipane filling, and poached pears nestled into the frangipane; that assemblage also gets baked til the frangipane is brown and a little puffy. I’ve substituted recipes from The Art of French Pastry for the crust and frangipane. (For those of you who want to up your baking game, I highly recommend that book; the author was one of my teachers in pastry school, and the recipes and instructions are really top-notch.)
I’ve also adjusted the poaching liquid for the pears: the original recipe calls for a whole bottle of white wine, but I’ve found that half wine and half water works just fine. The other ingredients for the poaching liquid are a cinnamon stick, vanilla (either extract or a bit of bean if I have some around), a sugar (I use honey), some cloves, lemon peel and lemon juice, and some fresh ginger. The original calls for peppercorns, which I omit, and I only use two or three cloves.
So, the basic recipe is the aforementioned crust, which is blind-baked for a half hour in an 11-inch tart pan; almond frangipane/almond cream, which is spread onto the cooled, par-baked crust; poached pears, which are blotted dry, sliced, and slid onto the frangipane, using an offset spatula; and, after the whole thing is baked and cooled, a little apple or currant jelly, heated enough to make it liquid, which is brushed onto everything to make it shiny and pretty.
A couple of notes on the recipe:
- It calls for four pears, but I usually get six or even eight; not all pears survive the poaching in good shape. Put a half a pear in the middle, then arrange the other seven halves around that half.
- Use a melon baller, if you have one, to get the seeds out of the pear; much easier than a spoon or knife.
- Make sure to dry the pears before putting them in the frangipane, or it will be way too wet and will bake unevenly.
- I’ve also made mini-tarts with small tart tins, with a half a pear per tart.
- You will probably need to put foil around the crust, especially the second bake, so it doesn’t burn.
As you can see, the tart is pretty, and it’s also quite tasty.
Well, but.
I still end up with a vat of poaching liquid, and I hate throwing things away. This time, I took some of the poaching liquid and added miso paste, soy, and garlic, and marinated some salmon, which I then sautéed in some toasted sesame oil: THAT was a good use of the poaching liquid. The other thing I’ll try next time is straining the liquid—possibly through a coffee filter—and then reducing it; I think the resulting syrup, mixed with club soda, could be a tasty drink; alternatively, I’d just use it as part of the mix when I make homemade ginger ale base. What’s that you say? Homemade ginger ale? Easy-peasy.
Grate a bunch of fresh ginger—I like to use my mini food processor, as that is WAY faster. Add a cinnamon stick, some honey, any citrus peel that’s laying around, all in the biggest bowl you have. Pour a bunch of boiling water over the whole thing and let it sit, preferably overnight; strain it through cheesecloth. (It will still collect sludge at the bottom of your jar; either shake it up or just avoid the sludge.) Mix with club soda for ginger ale, or hot water for ginger tea; add citrus juice(s) and/or honey to taste. It’s basically a simple syrup, so it’ll last awhile.
I’m hoping narya will share more dishes for the recipe exchange. We’re working out the details, it’s mostly time constraints on my end.
Once you’ve picked your chin up off the floor at the skill and artistry of this poach pear tart, hit the comments and share your holiday recipes. Or share some of those things you cook without ever using a recipe, and let us all be in awe of your skills, too.
by TaMara| 43 Comments
This post is in: Food & Recipes, Recipe Exchange, Recipes, yes, I know your recipe is always better than mine
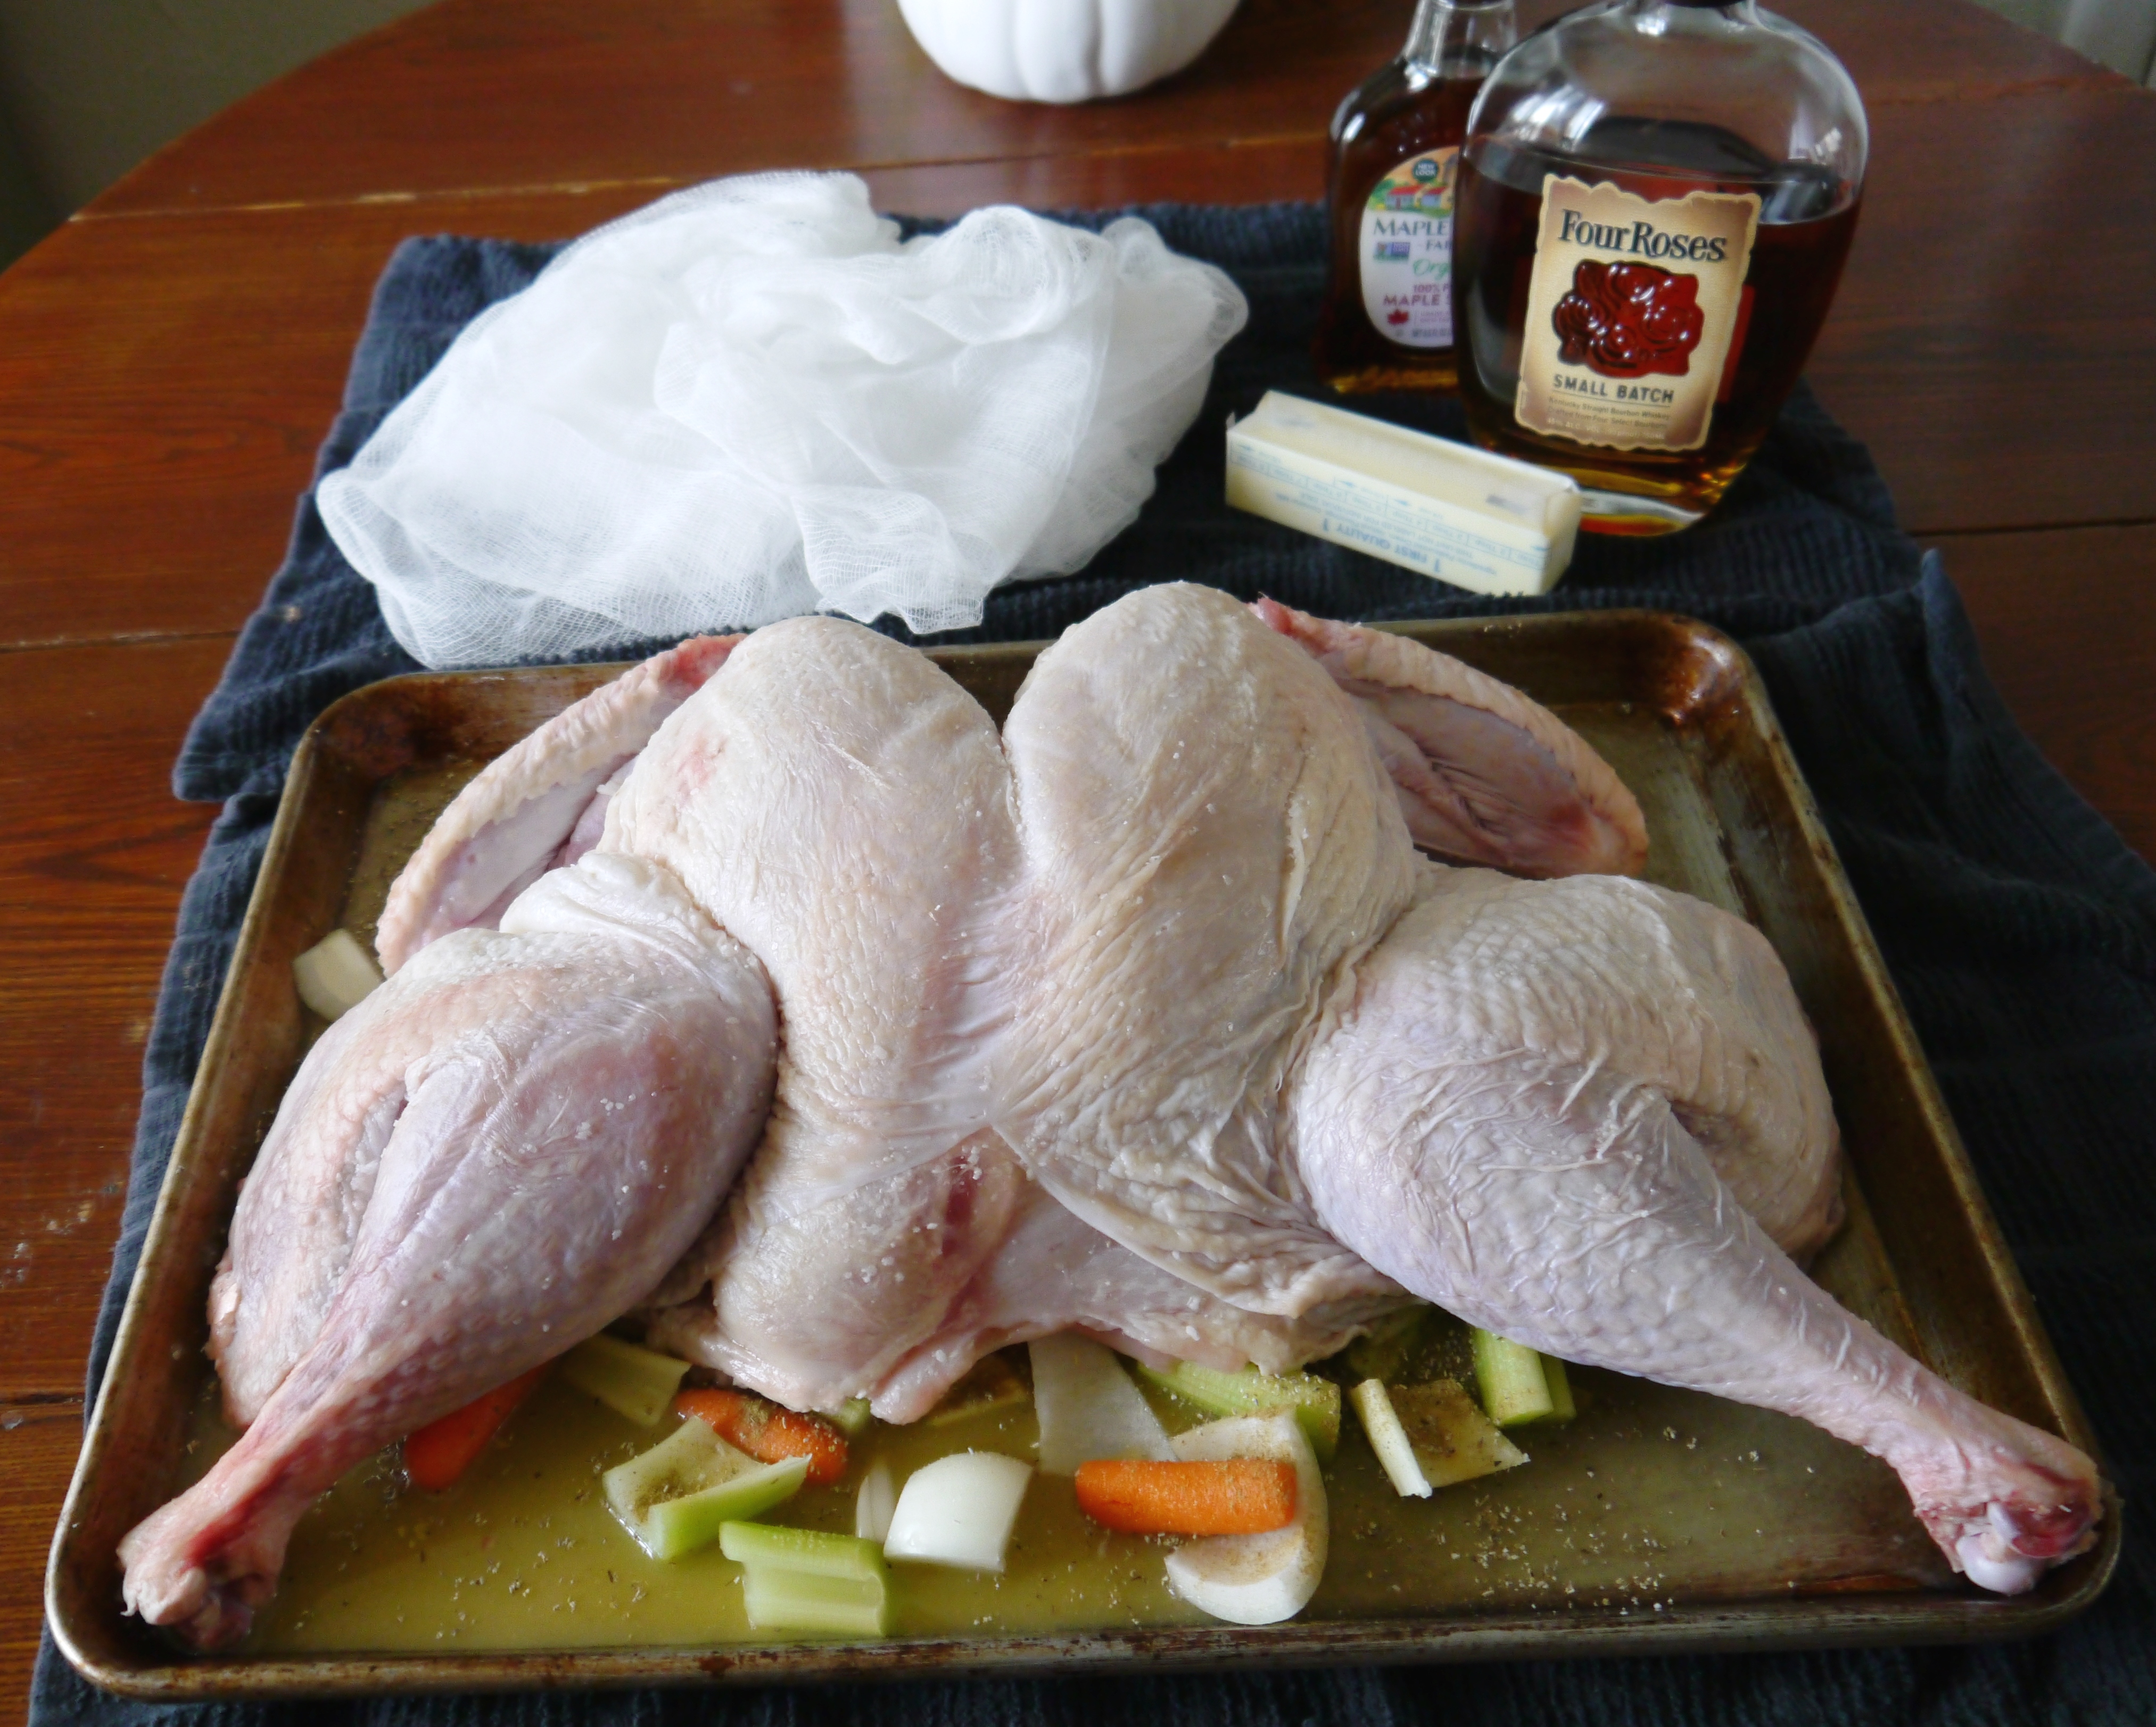
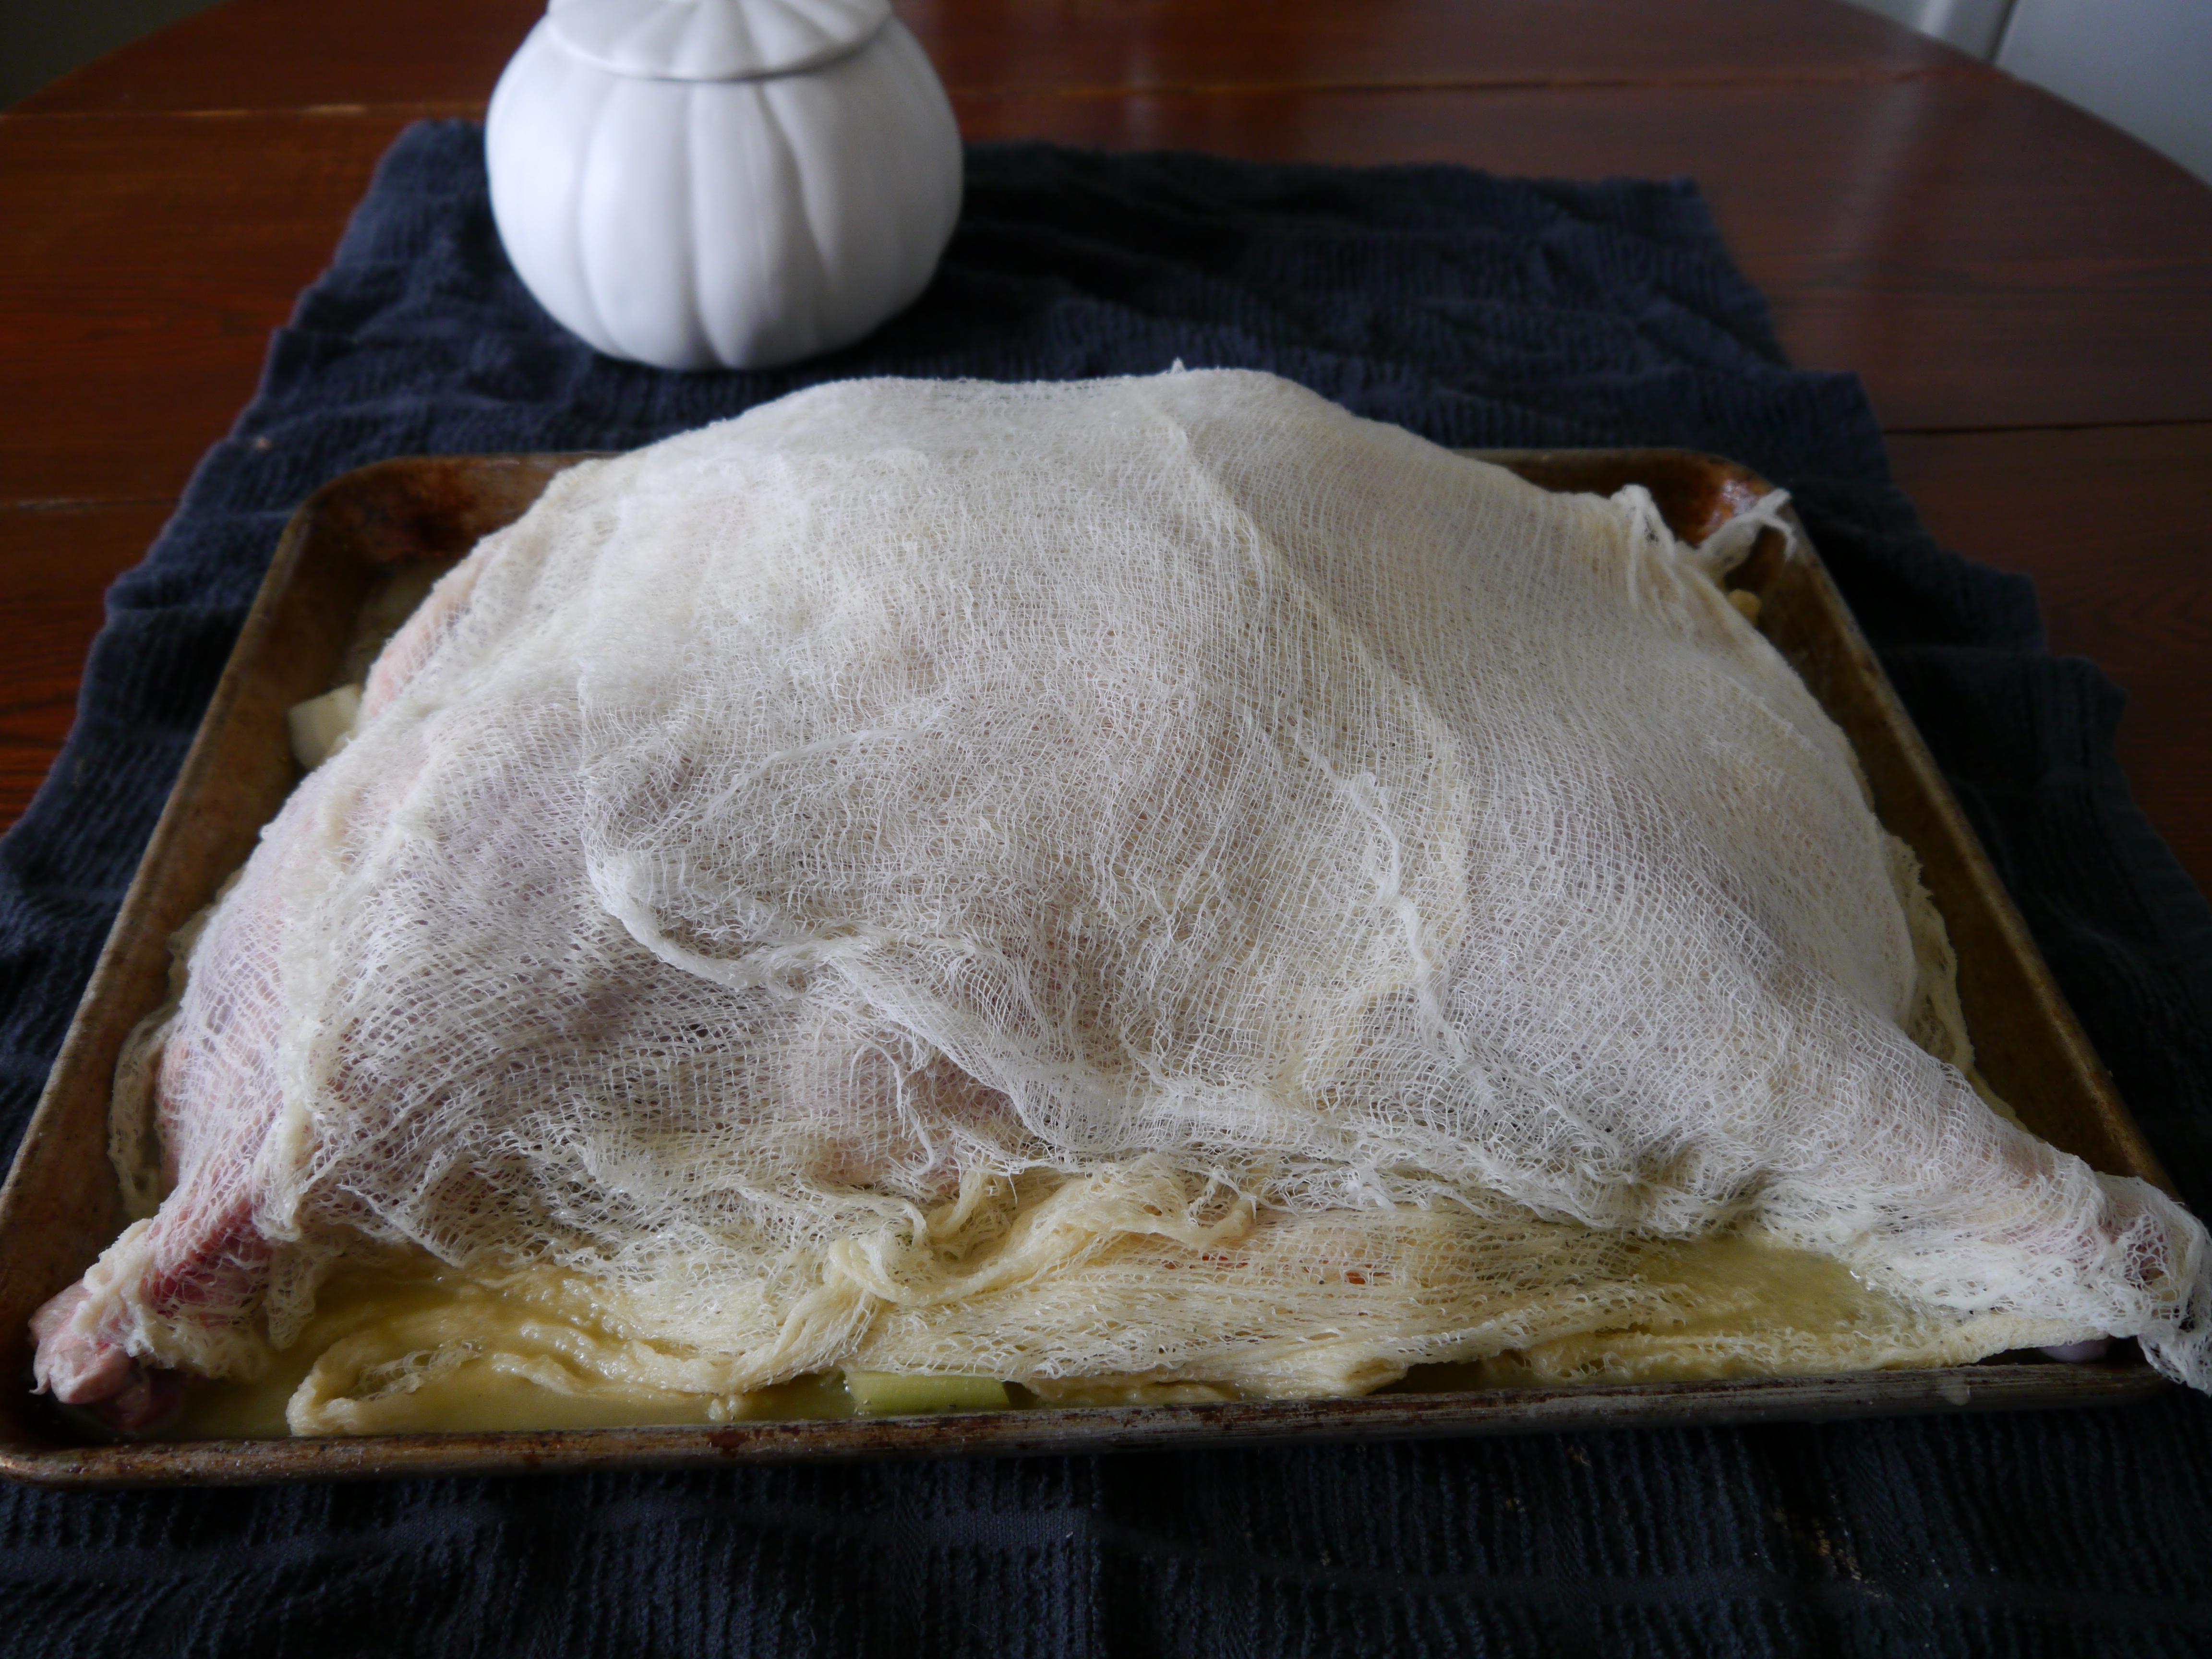
Next to a deep-fried turkey (that someone else cooks) Bourbon Maple Roasted Turkey has to be one of my favorite ways to cook a bird – in cheesecloth (!) no less. A recipe I shared in 2021 when I first tried it.
Turkey basics – try to stay with a 12 to 14 lb bird – two if you’re expecting a houseful. This size will cook quicker, stay moister, and generally taste better than a huge bird.
Second – spatchcock that baby. You’ll be able to use the back for stock and avoid dried-out white meat. This method roasts quicker, avoids the need to brine or inject the bird and lets the white and dark meats finish cooking at the same time.
Here is a great video on how easy it is to spatchcock a turkey, along with a very simple roasting recipe.
On to the Bourbon and Maple Syrup turkey recipe:
This recipe is from Chef Michael Symon. He has recipes and videos for a complete dinner (Link here – you don’t need a FB account to read or watch). This method was a success first time out.
Looks odd, but really kept the bird moist.
Michael Symons’ Roasted Spatchcock Turkey With Bourbon and Maple Syrup
cheesecloth, roasting pan
Notes: I skipped the cinnamon and clove – I’m not that adventurous, those are some very strong flavors. I substituted sage and rosemary for a fine flavor. Just as a reminder to make a recipe your own, no need to stick to it to the letter.
After the turkey is spatchcocked, preheat the oven to 425 degrees F (218 C).
Add the oranges, onion, and herbs to the bottom of the roasting pan. Place the turkey on top with the breast side up, thighs, and legs spread flat. Remove or tuck the wing tips under the bird. This step can be done a few hours ahead or the night before. Leave uncovered and refrigerated to allow the bird to dry.
In a saucepan, over medium heat, melt the butter. Add bourbon, syrup, cinnamon and cloves, simmer for 2 minutes. Remove from heat and let cool. Here’s the fun part, add cheesecloth and soak. Drape a double layer over the bird.
Pour the remaining contents of the pan over the bird and into the roasting pan.
Roast for 45 minutes at 425 degrees F, turn the temperature down to 375 degrees F (190 C), and roast an additional 30 minutes, remove cheesecloth and continue to roast until the internal temperature is 160 degrees F (72 C). Remove and cover to let the temperature come up to 165 degrees F (73 C) and rest – approximately 20 minutes.
If bourbon maple turkey isn’t to your taste, all the turkey recipes from years past can be found here.
============
While that turkey is roasting, how about getting those guests some appetizers to nosh on:
Stuffed Mushrooms (recipe here) and crucrudités tray with dips are faves here. I’m not opposed to chips and dips but have found over the years that folks are less likely to fill up on appetizers if they tend toward fresh veggies.
============
And don’t forget the sides:
Cranberry Sauce (recipe here) pictured top. If you have some folks who aren’t big cranberry fans, this recipe adds diced apples, which balances out the tartness of the cranberries.
Seasoned Green Beans with Bacon (recipe here)
Garlic Mashed Potatoes (recipe here)
Winter Squash Soup (recipe here)
If you’re in the mood for some non-traditional sides, got you covered with quite a few here.
And finally, to add to our dessert tray from the previous post:
Blueberry Pie and Apple Crisp. I leave the Pumpkin Pie to Mrs. Smith or others. And my Dad loves a good mincemeat pie – I buy the jarred filling and refrigerator pie crusts (like these) to make sure he gets his fave without too much effort from me.
All the other various Thanksgiving recipes and tips can be found here.
What’s on your menu this week? How do you cook your turkey? Favorite sidedishes you must have for it to be Thanksgiving? If you don’t do traditional turkey or Thanksgiving, what fun meal do you have?
Holiday Recipe Exchange: Let’s Talk Turkey and FixinsPost + Comments (43)
by TaMara| 111 Comments
This post is in: Food & Recipes, Recipe Exchange, Recipes, yes, I know your recipe is always better than mine
We don’t deserve Leslie Jones:
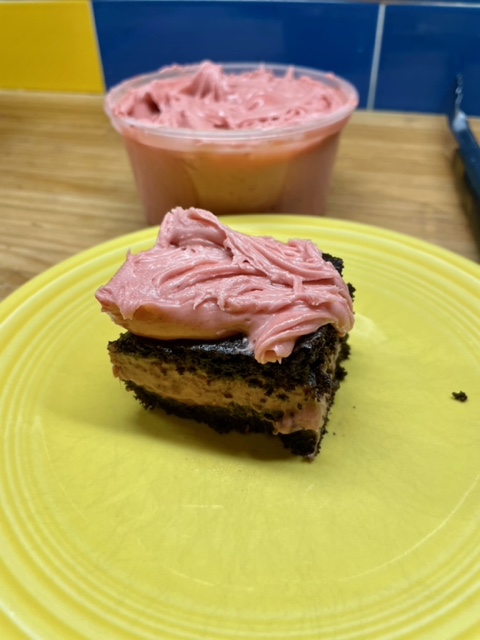
Let’s start with desserts first! I’m taking this crowd-pleaser to Thursday’s gathering:
If you’re going to be a guest at someone else’s Thanksgiving dinner, this is the dish to take. It’s pretty to look at and it’s both sweet and tangy, perfect after a big dinner. You’ll wow everyone with it and it’s foolproof to make.
Cranberry Upside Down Cake
Topping
8×8 glass baking dish & mixing bowl
Preheat oven to 350°
Melt 3 tbsp of butter and pour into baking dish, spread to cover bottom and up the sides. Add ½ cup sugar, mix with butter on bottom of pan. Add cranberries & walnuts, spread over bottom of pan. Cream remaining butter & sugar, add vanilla, egg, orange zest, mix well. Add flour, baking powder & milk, mix until well blended, don’t over mix. Pour batter over cranberry mixture. Bake for 1 hour, or until golden brown and center bounces back at the touch. Invert on plate. Let cool.
Topping: Mix together butter, orange juice & powdered sugar, pour over cake and serve.
* if you don’t have a food processor, you can leave cranberries whole. I did for the one pictured.
============
If you don’t like cranberries, how about pumpkin? Also very showy:
Buttermilk Pumpkin Bundt Cake recipe can be found here.
==============
Finally, a public service announcement
National Park Service LEGO Vignettes is at Yellowstone National Park.
It’s that time of year again. We don’t know who needs to hear this, but it is illegal to cook turkeys in the hot springs at Yellowstone National Park. Boiled, baked, stewed, roasted, brined, spatchcocked, grilled, braised, sous-vide, smoked, and deep fried are all illegal. They will ban you from the park! Just don’t do it. #FindYourPark #Thanksgiving
==========================
Bonus puppy. Scout turned 6 (!!) this month. Doesn’t seem possible. But it is very true. Still the Baby (we call Trixie the Puppy). This is her MUST. HAVE. WALK. NOW. face.
What’s on your holiday menu? Favorite desserts to share? What’s your pie of choice? I’m a blueberry gal, apple with a crumble top is a close second. Up later this weekend – Turkey and Sides! Stay tuned.
Share your recipes or ask recipe questions in the comments.
Giving Thanks Recipe Exchange: Leslie Jones Brings Order To The HolidayPost + Comments (111)